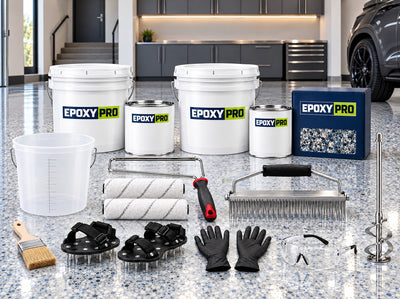
How to Use Epoxy Crack Filler Before Coating a Concrete Floor
Epoxy crack filler is a two-part paste you press into cracks in a concrete floor before you coat it. It bonds to the concrete, cures hard, and does not shrink back the way cement patch does. This guide covers when to use it, how much you need, how to apply it, and which repair product to reach for instead when the damage is not a crack. The product is R-818 Epoxy Crack Filler; all the repair products are in concrete repair.
Match the product to the damage
Four repair products cover almost everything a slab throws at you. Using the wrong one is the usual reason a repair shows through the finished floor.
| Damage | Use | Why | Coat over it |
|---|---|---|---|
| Hairline to 1/8 inch cracks, shallow pits, small chips | R-818 Epoxy Crack Filler, $54.99 to $154.99 | Rigid 100% solids epoxy paste. Bonds and stays put. 60 to 180 minutes of working time, so no rush. | Right away on small cracks |
| Spalls, pop-outs, holes, broken slab edges | R-343 Concrete Quick Fix, $49.99 to $69.99 | Fast urethane you pour over packed sand. Walk on it in 20 minutes. Works down to 20°F. | 1 hour |
| Saw-cut control joints and expansion joints | R-830 Flexible Joint Sealant, $59.99 per tube set | Stays rubbery so the joint can move. A rigid filler in a moving joint cracks again and takes the coating with it. | 1 hour |
| Deep spalls, forklift lanes, resurfacing at 1/8 to 1/4 inch | R-110 Epoxy Mortar, $59.99 to $174.99 | Trowel-grade epoxy with aggregate for rebuilding area, not lines. | 7 to 8 hours |
Skip powdered cement patch and hardware-store concrete crack caulk under an epoxy floor. Cement patch crumbles and loses its bond once the coating goes on; caulk stays soft and the epoxy over it wrinkles.
Which cracks need filling at all
- Hairline cracks you can barely catch a fingernail in: fill them. Epoxy coating bridges nothing. Every crack left open telegraphs through as a line in the finished floor, and a flake floor hides it less than you would think.
- Cracks up to 1/8 inch: R-818, after opening them up a little so the filler has something to grip.
- Cracks wider than 1/8 inch or with a lip, where one side sits higher: grind the high side flush, then treat the width like a small spall with R-343 if it is deep, or R-818 if it is shallow.
- Saw cuts: these are joints, not cracks. The slab was cut on purpose so it would crack there. Fill with the flexible R-830 if you want a seamless floor, or tape them and leave them as a clean line.
- A crack that is still moving (a gap that opens and closes with the seasons, or a slab that rocks): a rigid filler will crack again. Fill it with R-830, accept that the line may show, and expect to recoat that line over the years.
- Cracks that weep water: the slab has a moisture problem. Fill the crack, but the whole floor needs P-409 Moisture Vapor Primer. See how to test a concrete floor for moisture.
How much epoxy crack filler you need
R-818 covers about 1,228 lineal feet of crack 1/8 inch wide and 1/8 inch deep per gallon. In practice:
| Kit | Contents | Enough for | Price |
|---|---|---|---|
| 1/2 gal kit | 1 qt A + 1 qt B | A one-car garage with a few cracks, or touch-ups | $54.99 |
| 1 gal kit | 1/2 gal A + 1/2 gal B | A typical 2-car garage | $99.99 |
| 2 gal kit | 1 gal A + 1 gal B | A 3- or 4-car garage, a cracked basement, a small shop | $154.99 |
| 10 gal kit | 5 gal A + 5 gal B | Commercial floors | $724.99 |
Walk the floor and add up the crack length with a tape measure. Buy the next size up if you are also filling pits and chips; those eat material faster than a line does. Working time is long enough that you can mix the whole kit for a 2-car garage and use it in one go.
What you need
- R-818 kit
- Angle grinder with a diamond blade or a crack-chasing wheel, or a cold chisel and hammer for a few short cracks
- Shop vacuum
- Margin trowel or a stiff putty knife, 2 to 3 inches wide
- Mixing board or a scrap of plywood, or a bucket and mix wand for a full kit
- Nitrile gloves and safety glasses
- Acetone or denatured alcohol and rags for the tools
How to use epoxy crack filler, step by step
- Do it after grinding, before the final vacuum. Grinding opens the cracks so you can see them all, and it means the repairs get vacuumed and coated along with everything else. Prep order is in how to prep a garage floor for epoxy.
- Open the crack. Run the grinder or chasing wheel along the crack to cut a small V, about 1/8 to 1/4 inch wide and deep. Filler pushed into a hairline crack sits on top and pops off; filler keyed into a V stays. For hairline cracks you can skip the V and work the paste in hard with the trowel, but the V is the better repair.
- Vacuum the crack. Dust in the crack is the only thing that stops the bond. Run the vacuum nozzle along it slowly. Do not wet it.
- Check the temperature. R-818 goes down between 60 and 90°F. Cold concrete makes it stiff and slow. Below 60°F, use R-343 for the repairs or warm the slab.
- Mix 1:1. Equal parts by volume. For a few cracks, scoop equal amounts onto a board and fold them together with the trowel until the color is uniform with no streaks, two or three minutes. For a whole kit, pour both parts into a bucket and use a mix wand on a drill. The paste is thick; it does not pour.
- Press it in. Load the trowel and push the paste into the crack at an angle, working it down so there are no air pockets. Overfill slightly.
- Strike it flush. Pull the trowel flat along the crack to leave the filler level with the slab. Scrape the excess off the surrounding concrete now, while it is soft. Any ridge you leave has to be ground off later, and a ridge under a coating shows as a bump.
- Pits and chips. Fill the same way, pressing down first and then leveling across the top with the trowel edge.
- Coat over it. Small cracks can be coated right away; the base coat bonds to the uncured filler. For wide fills or deep pits, let it set until it is firm, usually tack free in 5 to 10 hours. If the floor is coated the next day, that works too. Foot traffic in 10 to 24 hours. Full cure takes 2 to 7 days, which does not matter if it is under a coating.
- Clean the tools with acetone before the epoxy sets. Cured epoxy does not come off a trowel.
Repairing spalls and chips with R-343 while you are at it
The quick fix is a different animal: a thin two-part liquid with 1 to 5 minutes of working time that you pour over sand packed into the hole. Vacuum the hole, pack it with the sand from the kit to just below the surface, mix a small amount of A and B, pour it over the sand until it is saturated, and scrape flush. Walk on it in 20 minutes, coat over it in an hour. Mix only what one hole needs; the rest will set in the cup. It works down to 20°F, which makes it the repair product for a cold garage.
Filling saw-cut joints with R-830
A dual cartridge with a static mixing nozzle; you need a dual-cartridge caulk gun. Vacuum the joint, push backer rod in if the joint is deeper than 1/2 inch, then run a bead to slightly above the slab. Cut it flush with a razor once it sets, in a few minutes. One tube set does 11 to 12 feet of 1/2 by 1/2 inch joint; a 2-car garage with two joints takes about four. Coat over it after an hour. The coating will show a faint line at the joint as the slab moves. That is the joint doing its job.
Common crack repair mistakes
- Filling before grinding. You miss half the cracks and the grinder takes the tops off your repairs.
- Not opening hairline cracks. The filler sits on the surface and the coating over it eventually shows the crack again.
- Leaving a ridge. Strike it flush while it is wet or grind it later. A ridge under a glossy or metallic floor is permanent.
- Rigid filler in a saw cut or moving crack. It re-cracks within a season.
- Cement patch under epoxy. It powders and lets go.
- Eyeballing the 1:1 mix badly. Off-ratio epoxy stays soft. Equal scoops, mixed until uniform.
- Filling a crack that weeps. The crack is not the problem; the moisture is. Prime the floor.
Epoxy crack filler FAQ
Can I use epoxy crack filler without coating the floor?
Yes. R-818 cures hard and gray and can be left as a repair on a bare slab. It is not UV-stable and will amber outdoors, which does not matter on a crack.
How long does epoxy crack filler take to dry?
Tack free in 5 to 10 hours at 70°F, foot traffic in 10 to 24 hours, full cure in 2 to 7 days. You can coat over small filled cracks immediately.
Is epoxy crack filler the same as epoxy floor coating?
Same chemistry, different consistency. The filler is a thick paste that holds its shape in a crack. The floor coating is a liquid that levels. Do not try to fill cracks with the coating; it runs out of them.
Can I fill cracks in a basement floor with it?
Yes, with the same steps. Basement cracks are more likely to carry moisture, so do the plastic sheet test and plan on P-409 if it fails. Read the basement floor epoxy guide.
What about cracks in the garage apron or driveway?
R-818 fills them, but it is rigid and ambers in sun. Outdoors, R-830 is the better choice in anything that moves, and a sealed crack outside will always be visible. For coating outdoors see can you epoxy an outdoor patio or pool deck.
Do I need to fill cracks if I am doing a flake floor?
Yes. Flake hides color variation and small texture. It does not hide a crack, and a crack left open under the base coat opens the coating along the same line.
Email a photo of the slab to support@epoxypro.com and we will tell you which repair products to add to the order. Every order includes a free 20-minute consultation. Call (877) 703-7699. If we miss you, we call back within an hour.