
How to Prep a Garage Floor for Epoxy
Prep decides how long a garage floor lasts. When a coating peels, it was almost always put down over concrete that was dirty, damp or too smooth. Set aside one full day for prep before anything goes on the floor.
What you need
- A floor grinder with a diamond cup wheel, rented by the day from a tool rental counter. Ask for one with a vacuum port.
- A shop vacuum
- A degreaser and a stiff scrub brush
- Plastic sheeting and duct tape for the moisture test
- Crack filler or patch material if your slab needs it
- A dust mask, safety glasses, gloves and knee pads
Step 1: Test for moisture (two days ahead)
Tape a 2 ft square of plastic sheet to the floor and seal all four edges. Leave it for 24 hours. If the underside is wet, or the concrete under it has turned darker, the slab is damp. A damp slab needs P-409 Moisture Vapor Primer under the coating, or the floor can lift. Basements and older slabs are the usual problem.
Step 2: Empty it and clean it
Move everything out. Scrape up anything stuck to the floor. Scrub oil and grease spots with degreaser, rinse and let the floor dry.
Check the oil spots again once they are dry. If a stain comes back, the oil has soaked into the concrete. Mark those spots. They get a coat of P-820 Oil Stop Primer before the base coat.
Step 3: Grind the floor
Epoxy grips rough, open concrete. It will not hold on concrete that is smooth, sealed or painted. Grinding is what makes the surface rough enough.
Work across the garage in overlapping passes. You are done when the whole floor is an even, dull gray and feels like 120-grit sandpaper. Use a hand grinder along the walls and in corners. If there is old paint or sealer, grind until it is gone.
Acid etching is the other option. It only works on bare concrete that has never been sealed, and it is less reliable than grinding. If you etch, follow the directions on the product, rinse well and give the floor at least 24 hours to dry.
Step 4: Repair cracks and holes
Vacuum first so you can see everything. Then:
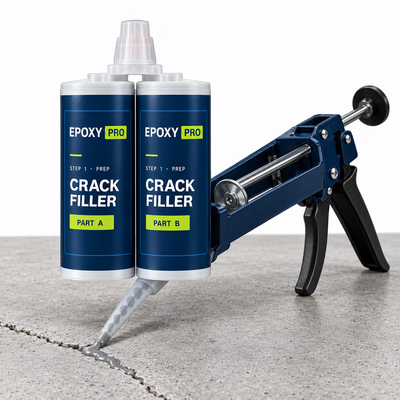
- Cracks: fill with R-818 Epoxy Crack Filler.
- Chips, spalls and holes: rebuild with R-343 Concrete Quick Fix.
- Saw cuts and expansion joints: fill with R-830 Flexible Joint Sealant.
Once the repairs have set, scrape or grind them flush with the floor.
Step 5: Vacuum twice
Dust is the last thing that can ruin the bond. Vacuum the whole floor, then do it again, including the edges along the walls. Do not wash the floor with water at this point. If you have to, give it a full day to dry.
Step 6: Check the temperature
The slab and the air should be between 60 and 90°F, with humidity under 85%. Close the garage door the night before so the slab settles to a steady temperature. Keep direct sun off the floor while you work.
A simple schedule
- Two days before: moisture test.
- The day before: empty, clean, grind, repair and vacuum.
- Coating day: start in the morning, when the slab is coolest.
You can prep and coat on the same day if you start early, but most people find it easier to split them.
Not sure about your slab? Call a coating expert at (877) 703-7699, Monday to Saturday, 8am to 6pm ET. Every order comes with a free 20-minute consultation.
 How to Prep a Basement Floor for Epoxy
 Do I Need to Patch Cracked Concrete Before Applying an Epoxy Coating?
 Do I Need to Remove Oil and Grease Stains Before Applying Epoxy?